
(This post, my first of 2016, has nothing to do with advertising or radio. Rather, I’m going to share my recipe for making homemade ginger beer – the non-alcoholic variety – along with some valuable tricks I’ve learned along the way for improving both the process and the result.)
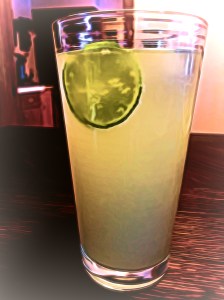
A glass of homemade ginger beer with a slice of fresh lime
I’ve been working at this for a few years now, after having been introduced to the delicious homemade ginger beer at South Fork Public House in Pullman. Friends have asked me for the recipe so after making another batch today, I decided to share the recipe here, along with a few iPhone pics that document the process at the end of the post.
The basic recipe is super simple – just 5 ingredients. I usually make a gallon at a time.
EQUIPMENT I USE:
– a clean one-gallon jug with screw cap
– nut milk bag (makes extraction of juice from pulp SO much neater and easier)
– 2 small funnels (one for the wet ingredients, one for sugar)
– my wife’s food processor (for grating ginger root to a pulp; you can do this by hand with a vegetable peeler, grater, or Microplane, as I started out doing, but it’s tedious and time-consuming. The food processor and nut milk bag simplify the job and make it a lot less messy. In fact, I don’t even bother peeling the ginger root anymore. Just wash it and feed it into the processor.)
– (optional) a small piece of cheesecloth to further filter solids from the ginger juice when pouring it into the jug
INGREDIENTS:
1. 1 large ginger root (around 1/2 pound, enough to yield 6-7 tablespoons of ginger juice)
2. 2 cups of sugar
3. 3 tablespoons freshly-squeezed lemon juice
4. 4 quarts of water
5. One-half teaspoon of active dry yeast (If you want to get fancy, you can use white wine or champagne yeast. I get mine at Tri-State Distributors in Moscow.)
DIRECTIONS:
Using a funnel (with cheesecloth filter if desired), pour 6-7 tbs. of ginger juice into the jug, followed by the lemon juice. Using the dry funnel, add sugar and yeast. Fill jug with approximately 4 quarts of water. Be sure to leave 2-3 inches of air space to allow for expansion due to build up of carbon dioxide as the yeast “eats” the sugar.
Cap the jug and shake/swirl the contents until the ingredients are mixed and the sugar is dissolved.
Let the jug stand at warm room temperature for 48 hours. After 48 hours place the jug in a refrigerator to stop fermentation. Chill it until it’s good and cold, then pour yourself a tall glassful with ice and a lime wedge. Enjoy!
NOTES AND TWEAKS:
I prefer to use a glass jug, rather than, say, a one-gallon plastic milk jug. I place it into a plastic 5-gallon bucket with a tightly fitted lid, reasoning that if I am unable to retrieve and chill the ginger beer after 48 hours and the bottle should burst, any resultant mess would be contained. Earlier this year I experimented with the 48-hour window by letting the ginger beer ferment an extra 12 hours, thinking it would add a little more “bite.” When I went to retrieve the jug from the pail, I found a depressingly delicious-smelling batch of ginger beer swirling around shards of glass at the bottom of the bucket. Lesson learned. Stay with 48 hours’ fermentation at room temperature and you’ll be fine. If you’re concerned about a bottle explosion the first time around, after 30-36 hours you can open the cap to release a little CO2, then recap tightly for the remainder of the fermentation time.
These days I also prefer to use a little less sugar than the recipe calls for, maybe 1 3/4 cups instead of 2. It makes for a drier taste that I prefer.
After your first batch, you may wish to make modifications to suit your taste. I’ve recently been experimenting with adding spices to the mix. Last time I made a gallon, I added a pinch each of cardamom, dried orange peel, and ginger powder. It was tasty! Today I made a half recipe, adding a nip each of cardamom, dried orange peel, ginger powder, nutmeg, cinnamon, and black pepper. We’ll see how it turns out, but I’m optimistic.
A breakthrough! Last time I made a batch, there was quite a bit of leftover ginger juice. I decided to pour it into a snack-size zip-lock plastic bag and freeze it, happy at the thought that it would save me a step and the extra clean-up next time. Eureka! So last time I went to the store to buy ginger root, I bought a pound of it, and after making today’s batch I had 5 baggies of ginger juice to freeze – enough for another two-and-a-half gallons of ginger beer in the coming weeks.
Here’s a 27-sec. time-lapse I made just for fun.
